If you’ve got a workshop shed from Affordable Portable Structures or are planning to get one, you’re probably dreaming of taking it to the next level. A basic shed is great for storage, but adding electricity and plumbing can transform it into a fully functional workspace for your projects, whether you’re woodworking, crafting, or running a small business out of your backyard. Here in the Austin area, where we deal with hot summers and the occasional Texas downpour, setting up these utilities right is key. Let’s walk through how to add electricity and plumbing to your workshop shed in a friendly, step-by-step way, keeping local conditions and regulations in mind. This guide is packed with practical tips to make your shed the ultimate creative hub!
Why Add Electricity and Plumbing?
Before we dive in, let’s talk about why this upgrade is worth it. Electricity means lights, power tools, and maybe even a mini fridge for those long workshop sessions. Plumbing? That’s a game-changer for adding a sink to clean brushes, a bathroom for convenience, or even a water hookup for specialized equipment. Together, these upgrades make your shed more versatile and comfortable, especially for long hours in Austin’s heat. Plus, a well-equipped workshop can boost your property’s value and appeal. But, fair warning: this isn’t a weekend DIY for everyone—it involves planning, permits, and sometimes pros. Let’s break it down.
Step 1: Plan Your Setup and Check Local Regulations
First things first—don’t grab a shovel or wire cutters just yet. Start with a plan. Ask yourself: What do you need? A couple of outlets for tools? Overhead lighting? A full bathroom? Sketch out your shed’s layout, noting where you want outlets, lights, or plumbing fixtures. At Affordable Portable Structures, our sheds (like our 10×12 or 12×20 models) can be customized with pre-wired frames or extra space for plumbing, so let us know your plans early.
Next, check Austin and Travis County regulations. Most areas require permits for electrical and plumbing work, especially if you’re tying into your home’s systems. Sheds under 200 square feet might dodge some permit requirements, but anything involving utilities usually needs approval. Contact the City of Austin’s Development Services Department or your local permitting office (e.g., in Round Rock or Pflugerville) to confirm. HOAs can also have rules, so double-check if you’re in a neighborhood like Cedar Park. Ignoring permits can lead to fines or having to rip out your work—yikes!
Pro tip: Budget for permits (a few hundred bucks) and consider hiring a licensed contractor for inspections. It’s a small price for peace of mind.
Step 2: Preparing Your Shed for Utilities
Your shed needs to be ready for the job. If you’re buying new, ask us at Affordable Portable Structures for a model with reinforced floors and walls to support wiring and pipes. For existing sheds, ensure the structure is level and anchored—Texas storms don’t mess around. Check that walls are insulated (especially for plumbing to prevent frozen pipes in rare cold snaps) and sealed against moisture to protect electrical components.
For electricity, you’ll need a clear path from your home’s main panel to the shed. For plumbing, you’ll need access to your home’s water line and sewer or septic system. Measure the distance—sheds far from the house (say, 50+ feet) may need trenching for underground lines, which adds cost. Our sheds are built tough for Austin’s climate, with options for vapor barriers and weather-resistant siding to keep your setup safe.
Step 3: Adding Electricity to Your Workshop Shed
Now, let’s light it up! Adding electricity involves three main steps:
Running Power to the Shed
You have two options: overhead or underground lines. Underground (using conduit and UF-B cable) is safer and cleaner-looking but requires trenching (about $5–$10 per linear foot in labor). Overhead lines are cheaper but need proper clearance (10 feet above ground, per Austin codes). Most sheds need a 20–60 amp subpanel to handle tools and lights—check with an electrician to size it right.
Wiring the Shed
Inside, install outlets (at least 15–20 amps for power tools), switches, and lighting. Recessed LED lights are great for bright, even illumination, and GFCI outlets are a must near sinks or damp areas. Run wires through conduit for safety, and space outlets every 6–8 feet for convenience. If you want Wi-Fi or a space heater, plan for extra circuits. Our sheds can come prepped with conduit channels to make this easier.
Hiring a Pro and Staying Safe
Unless you’re a licensed electrician, hire one for this part. Electrical work is no joke—faulty wiring can cause fires or shocks. A pro will cost $1,000–$3,000 for a basic setup, depending on distance and complexity. They’ll also handle inspections to ensure compliance with Austin’s electrical codes (based on the National Electrical Code, NEC).
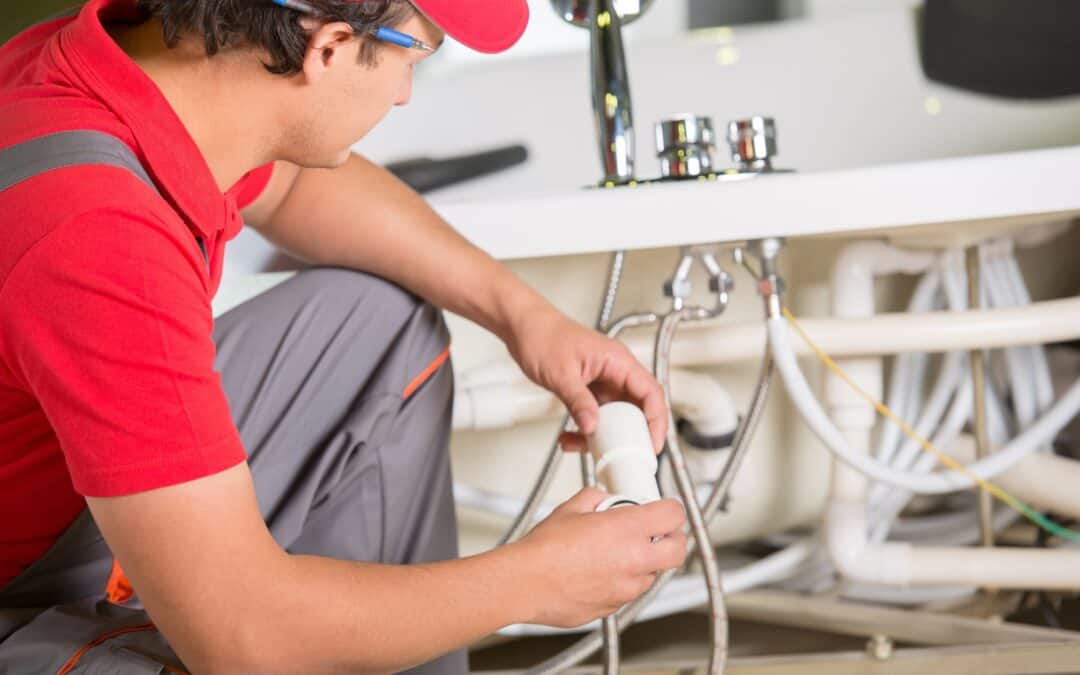
Step 4: Adding Plumbing to Your Workshop Shed
Plumbing is trickier but totally doable. Here’s how to make it happen:
Connecting to Water and Sewer
You’ll need to tap into your home’s water line for supply and connect to a sewer or septic system for drainage. This usually means trenching to run PVC or copper pipes (copper’s pricier but durable). In Austin, where soil can be rocky, expect trenching costs of $10–$20 per foot. If you’re only adding a sink, a single water line and drain might suffice. A bathroom? You’ll need hot/cold lines, a drain, and possibly a vent stack.
Installing Fixtures
Inside, install your sink, toilet, or other fixtures. A small utility sink is perfect for cleaning tools and costs $100–$300. For a bathroom, consider a compact toilet and sink combo to save space. Insulate pipes to prevent freezing (rare but possible in Austin winters), and use PEX piping for flexibility and cost savings. Our larger sheds can accommodate small bathrooms—just let us know when ordering.
Hiring a Plumber
Like electricity, plumbing is best left to pros unless you’re experienced. A licensed plumber ensures proper pressure, drainage, and code compliance (Austin uses the International Plumbing Code). Expect to pay $1,500–$5,000 for a basic setup, more for a full bathroom. They’ll also handle permits and inspections.
Step 5: Finishing Touches and Maintenance
Once your utilities are in, add finishing touches. For electricity, install surge protectors to safeguard tools from power spikes (common during Texas storms). For plumbing, add a shut-off valve inside the shed for easy maintenance. Test everything—flip switches, run the sink, check for leaks. Keep your shed ventilated to prevent mold, especially with Austin’s humidity.
Maintain your setup by checking wires and pipes annually for wear, especially after heavy rains. Seal any gaps to keep out pests (looking at you, Texas critters). If you’re not using the shed in winter, drain pipes to avoid freezing.
Austin-Specific Tips
Austin’s climate and regulations shape your project. Our summers (90°F+) demand good insulation and ventilation to keep your shed cool—consider a mini-split AC unit if you’re wiring for power. Check for underground utilities (call 811) before trenching to avoid hitting gas or water lines. If you’re in a flood-prone area like parts of South Austin, elevate your shed slightly and ensure proper drainage.
Wrapping It Up: Your Dream Workshop Awaits
Adding electricity and plumbing to your workshop shed is a big step, but it’s worth it for a functional, comfortable space. Start with a solid plan, work with pros for safety and compliance, and lean on Affordable Portable Structures for a shed built to handle these upgrades. Whether you’re in Austin, Leander, or Round Rock, we’ve got customizable options to fit your vision. Ready to power up your projects? Give us a call or visit our lot to get started. Here’s to building, creating, and thriving in your ultimate workshop!
Recent Comments